



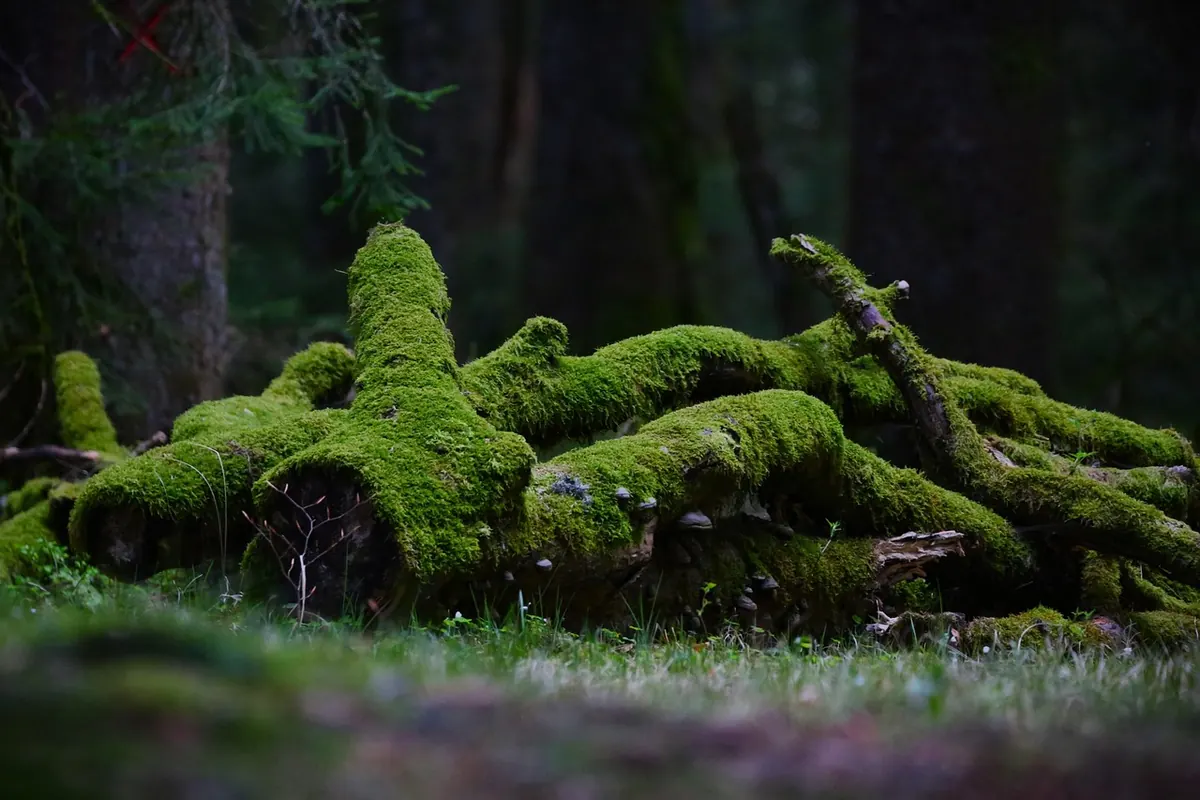
Every wood has a handful of characters that most walkers step straight over: the fallen trunk half sunk in leaf litter, the stump wearing a fringe of moss, the birch log that collapses into brown crumbs when you press it. These are the busiest addresses in the forest. A standing tree supports life; a dead one feeds it. Beetle larvae chew galleries under the bark, fungi turn solid wood into something the soil can use again, and shrews, wrens and overwintering insects move into the gaps.
Keeping a journal at deadwood suits the habit of forest journaling better than almost any other subject, because the thing in front of you changes slowly enough to revisit and quickly enough to surprise you. Here is what to look for, and what to write down while you are crouched there with cold fingers.
Begin With the Log, Not the Life On It
It is tempting to go straight for the bright stuff, the bracket fungus or the moss cushion or the beetle scuttling for cover. Resist for a minute. The plain facts about the log explain most of what you will find on it, and they take two minutes to record.
- Species, if you can tell. Bark, twigs, buds and the leaf litter underneath will usually give it away. A guess written down as a guess is still useful.
- Size. Hug the trunk and note your arm span, or measure with a stick and mark it later. Length in paces is fine.
- Bark. Tight, loose, in plates, or gone. Note which side it is hanging from.
- Position. On a slope, in a hollow, across the path, half in the stream, in full sun or deep shade.
- What it is resting on. Soil, rock, another log. Rot runs fastest where wood meets wet earth.
- What is above and beside it. Conifer or broadleaf canopy, bracken, bilberry, nettles, a badger path.
A five-step decay scale you can reuse
Consistency matters more than precision. Choose a scale, write it on the inside cover of your notebook, and score the same log the same way on every visit.
- Freshly fallen. Wood solid, bark intact, a dull ring when you tap it with a stick.
- Sound but softening. Bark loosening, a knife blade sinks a few millimetres, wood still pale.
- Half gone. Bark coming away in plates, wood spongy, a thumb leaves a dent, first big fruiting bodies.
- Soft and hollow. Crumbles by hand, moss and liverwort across the top, hidden cavities inside.
- Returned. No shape left, just a low line of dark humus and a change in the plants growing through it.
Fungi: The Ones Doing the Work
Fungi are the reason the log is disappearing, and the way they digest it leaves visible evidence. Brown rot fungi take the cellulose and leave the lignin, so the wood browns, cracks into cubes and crumbles like coarse coffee grounds. White rot fungi break down lignin as well, leaving pale, stringy, fibrous wood, sometimes scribbled with black zone lines. Note which one you are looking at; it tells you what the wood will feel like in a year.
Then look at the fruiting bodies themselves: brackets and conks, flat crusts, jelly ears on elder, little clubs and cups, sulphur tufts on stumps. Turn one over or use a hand lens. The underside is the fastest identification shortcut you own, whether it shows pores, gills, teeth or a smooth surface.
Prompts for the fungi page
- Where exactly is it growing: on bark, on bare wood, on the damp underside, or on the soil beneath?
- Is it soft and rubbery, hard and woody, or brittle? Does it bruise when nudged?
- Single, in tiers, or scattered along the whole length of the log?
- Sketch the outline, then record the pore or gill colour while it is fresh. A photo with your thumb in frame gives you scale later.
- Look for black bootlace strands under loose bark. They are a good sign of a fungus working its way through the wood.
- What has changed since last time: dried out, nibbled by slugs, blackened, gone?
Handle fungi gently and never eat anything identified from a sketch and a photograph. Some common woodland species are seriously toxic, and a picture is not a diagnosis.
Mosses, Liverworts and Lichens: The Green Record
The upper surface of a log carries a map of its own moisture. Mosses gather where water sits and shade holds; liverworts spread as flat green ribbons in the damper hollows; lichens take the dry, exposed top and the bare wood where the bark has gone. Watch the line where the moss thins out. That edge marks the zone that dries first, and it shifts over the seasons, which makes it a cheap way of recording moisture without any equipment.
In your notes, describe the green cover in rough percentages rather than trying to name every species, then pick one patch and sketch it large. Add the texture: feathery, cushiony, flat, powdery, crusty. Come back in three months and measure the patch again.
Insects and the Crowd Under the Bark
Lift loose bark slowly, from one end, and put it back exactly as you found it. Underneath you will often find frass first: fine sawdust, oval pellets, or floury dust packed into the groove. Then the galleries, which are worth drawing rather than describing. A central tunnel with short side branches is the work of a bark beetle; wide, irregular hollows belong to larger larvae. Note the width of the tunnels against a pencil lead, and the shape of any exit holes.
There will be tenants too: woodlice in the damp pockets, millipedes and centipedes, ground beetles, earwigs, slugs, spiders, the occasional overwintering queen. A stump with a sawdust pile at its base usually has ants inside. Keep the log-rolling short in hard frost, when small animals are deep in the wood and least able to cope with being exposed.
Who Else Uses It: Teeth, Scats and Holes
Deadwood is furniture as much as food. A log across a ride becomes a latrine for foxes, a spraint site for otters on waterside logs, a basking platform for lizards on a sunny morning. Squirrels leave stripped cones shredded into a messy heap; mice leave neater piles of scales in a quiet corner. Woodpeckers wedge cones into a favourite crevice to hammer them open, and the debris underneath gives the spot away. Upturned root plates hold wren nests; hollow stumps hold owls, bats and bees.
Record what you find without digging for it. A photograph from a respectful distance, a note of the hole's height and width, and a sketch of the surrounding debris will tell you more next visit than a close-up ever will.
Keep a Return Visit Sheet
Give each log a page, a rough name and a fixed photo point: a distinctive fork, a boulder, a particular trunk. Note the direction you were facing and how many paces you stood from the log, so the next photograph lines up with the last. Write the date, the weather, and what the week before was like, since many fungi appear two or three days after rain following a dry spell. A simple cross-section sketch, with the soft core and the sound rim marked, tracks decay faster than words do.
Field Kit and Good Habits
- A pencil and a waterproof notebook, plus a hand lens and something for scale: a coin, a small ruler, or your own thumb.
- A soft brush and a blunt stick for lifting bark, rather than fingers that crush what is underneath.
- Gloves in winter, and a phone kept warm in an inside pocket.
Leave the wood as you found it. Replace lifted bark, roll nothing further than you need to, and skip the nails, flagging tape and painted numbers. In protected areas, check what you are allowed to touch and collect before you start, and photograph rather than pocket anything you are unsure about.
Pick one log this week, record it properly, and go back to it in a month. That second visit is where a walk in the woods turns into a diary.
Photo: Robg43 / Pixabay
Related posts
More stories you’ll love reading